Website Generator
Your website, done. No tech skills required.
Three sessions. One website. Zero code.
You just bought the Robot Snacks Website Generator. Think of it as a smart, patient website-building partner you talk to in plain English. You answer questions about your business; the skill drafts everything; you react and refine. By the end, your real, professional, mobile-friendly website is live on the internet.
A skill is a small set of instructions Claude reads before starting a task, so it knows exactly how to help you with that one thing. This particular skill teaches Claude how to build, deploy, and maintain a real small-business website with you, entirely through chat.
All of this happens inside Cowork. Cowork is the file-aware mode in Claude Desktop. It lets Claude read and write files in a project folder on your computer, which is what makes building a real website possible. In a regular Claude chat (or on the claude.ai website, or in Claude Code), Claude can talk but can't touch your files. That's why this skill runs in Cowork specifically.
The connective tissue between all three sessions is one file called site_brief.md. Claude writes it for you in Session 1, saves it to your project folder, and reads it back every time you start a new session or come back later to update something.
Robot Snacks is a product line of AI skills for small business owners. You can find us at robotsnacks.io.
Six things to have ready.
A Claude account. Pro ($20/month) covers the whole build. The thing to plan around: Session 1 plus Session 2 is too much to do back-to-back in one sitting on Pro. Claude's usage limits reset after a few hours, so the easiest pattern is to do Session 1 one day and Session 2 a few hours later (or the next day). Max ($100/month) is an option if you'd rather go straight from Discovery into Build without waiting.
The Claude Desktop app, used in Cowork. Not the website version of Claude, not a plain chat, not Claude Code. Cowork is the file-aware mode inside Claude Desktop that gives the skill access to your project folder.
Two settings turned on. Memory (so Claude remembers your project) and web access set to "Allow all websites" (so Claude can find stock photos).
A free Netlify account. Netlify hosts your finished site. Free tier, no credit card.
Your logo and photos. If you don't have photos, browse pexels.com or unsplash.com, pick ones that fit your business, and drop them into the photo folder before Session 1. A few minutes here makes a big difference.
Eight steps. One-time setup.
About 30 minutes start to finish.
When you unzip the Website Snack Pack, the My Website folder is already set up for you, with the My Photos and Logo and Skill Files subfolders inside. You don't create any folders. You just use what's already there.
Drag the zip out of Downloads. Then unzip it.
Move Website Snack Pack.zip to Documents, Desktop, or Google Drive. Unzip it there.
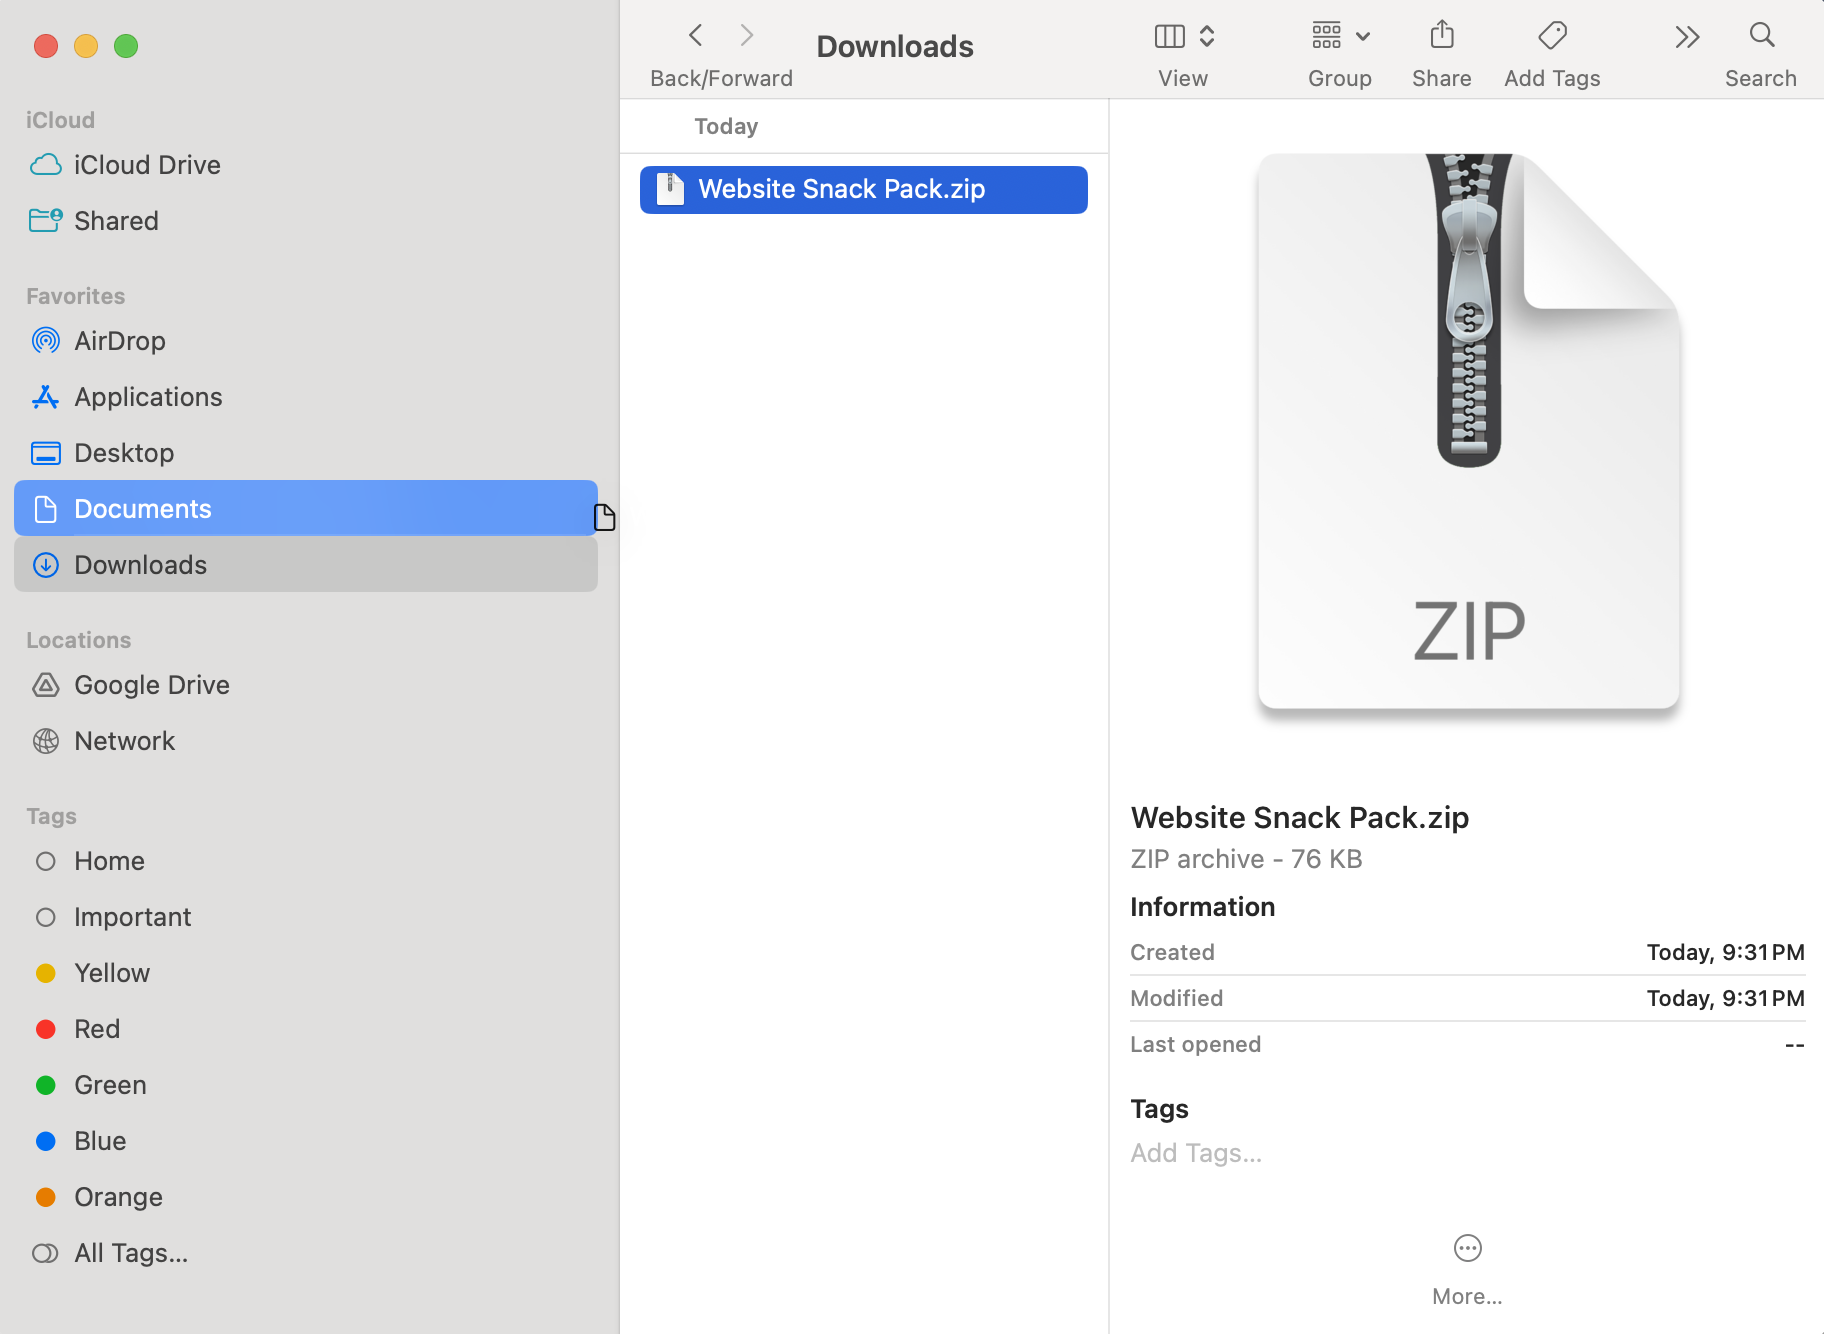
Website Snack Pack.zip being dragged from Downloads to Documents, mid-drag.Downloads gets cleaned up periodically, and Cowork projects shouldn't point at folders that might disappear. Start by dragging Website Snack Pack.zip out of Downloads into Documents, Desktop, or Google Drive. Anywhere it can live permanently is fine.
Once it's in its new home, unzip it there. Double-click the zip on Mac, or right-click → Extract All on Windows. You'll get a Website Snack Pack folder right next to the zip.
Inside that folder, you'll see one file (SKILL.md) and one folder (My Website). Inside My Website you'll see two subfolders already set up for you:
My Photos and LogoSkill Files
Don't rename anything, and don't worry about what's in Skill Files. That's the skill's own working files.
Get a Claude account. Install the Desktop app.
Download from claude.ai/download. Sign in.
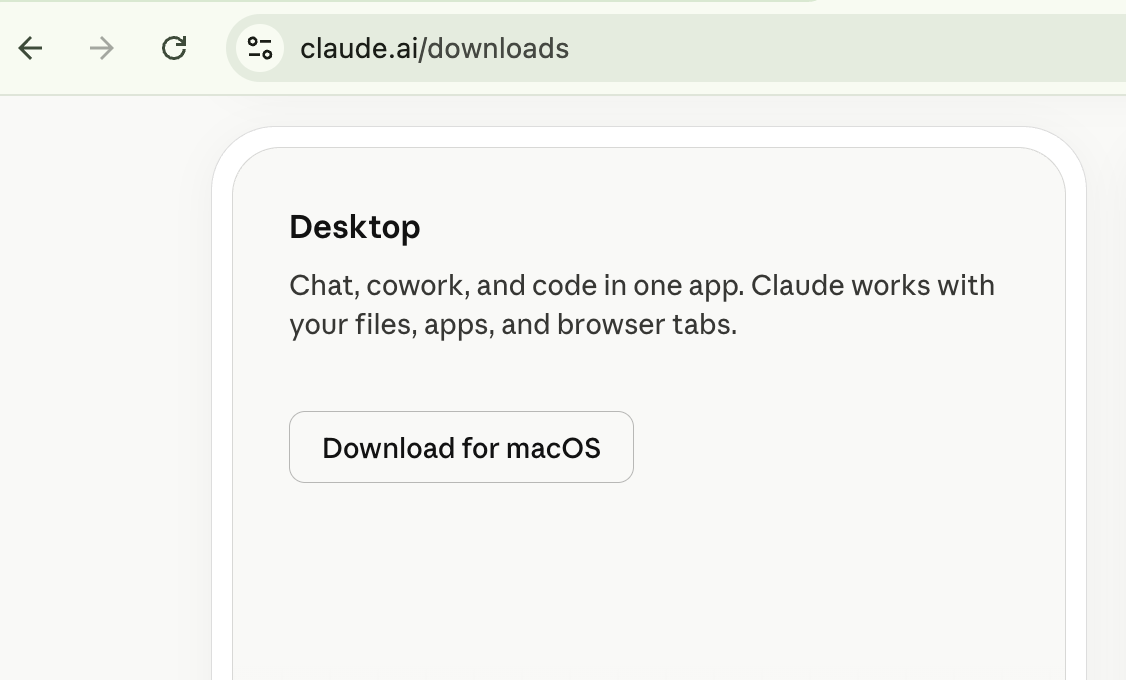
If you don't already have a Claude account, sign up at claude.ai. Pro ($20/month) is all you need. Just plan a few hours between Session 1 and Session 2 so your Claude usage has time to reset. Max ($100/month) is an option if you'd rather go straight from Discovery into Build without pausing.
Then download the Desktop app from claude.ai/download. The Desktop app is required because Sessions 2 and 3 read and write files on your computer, and the website version of Claude can't do that.
Install the app, sign in, and leave it open. You'll come back to it in Step 3.
Turn on Memory. Set web access to "Allow all websites."
Settings → Capabilities. Two toggles.
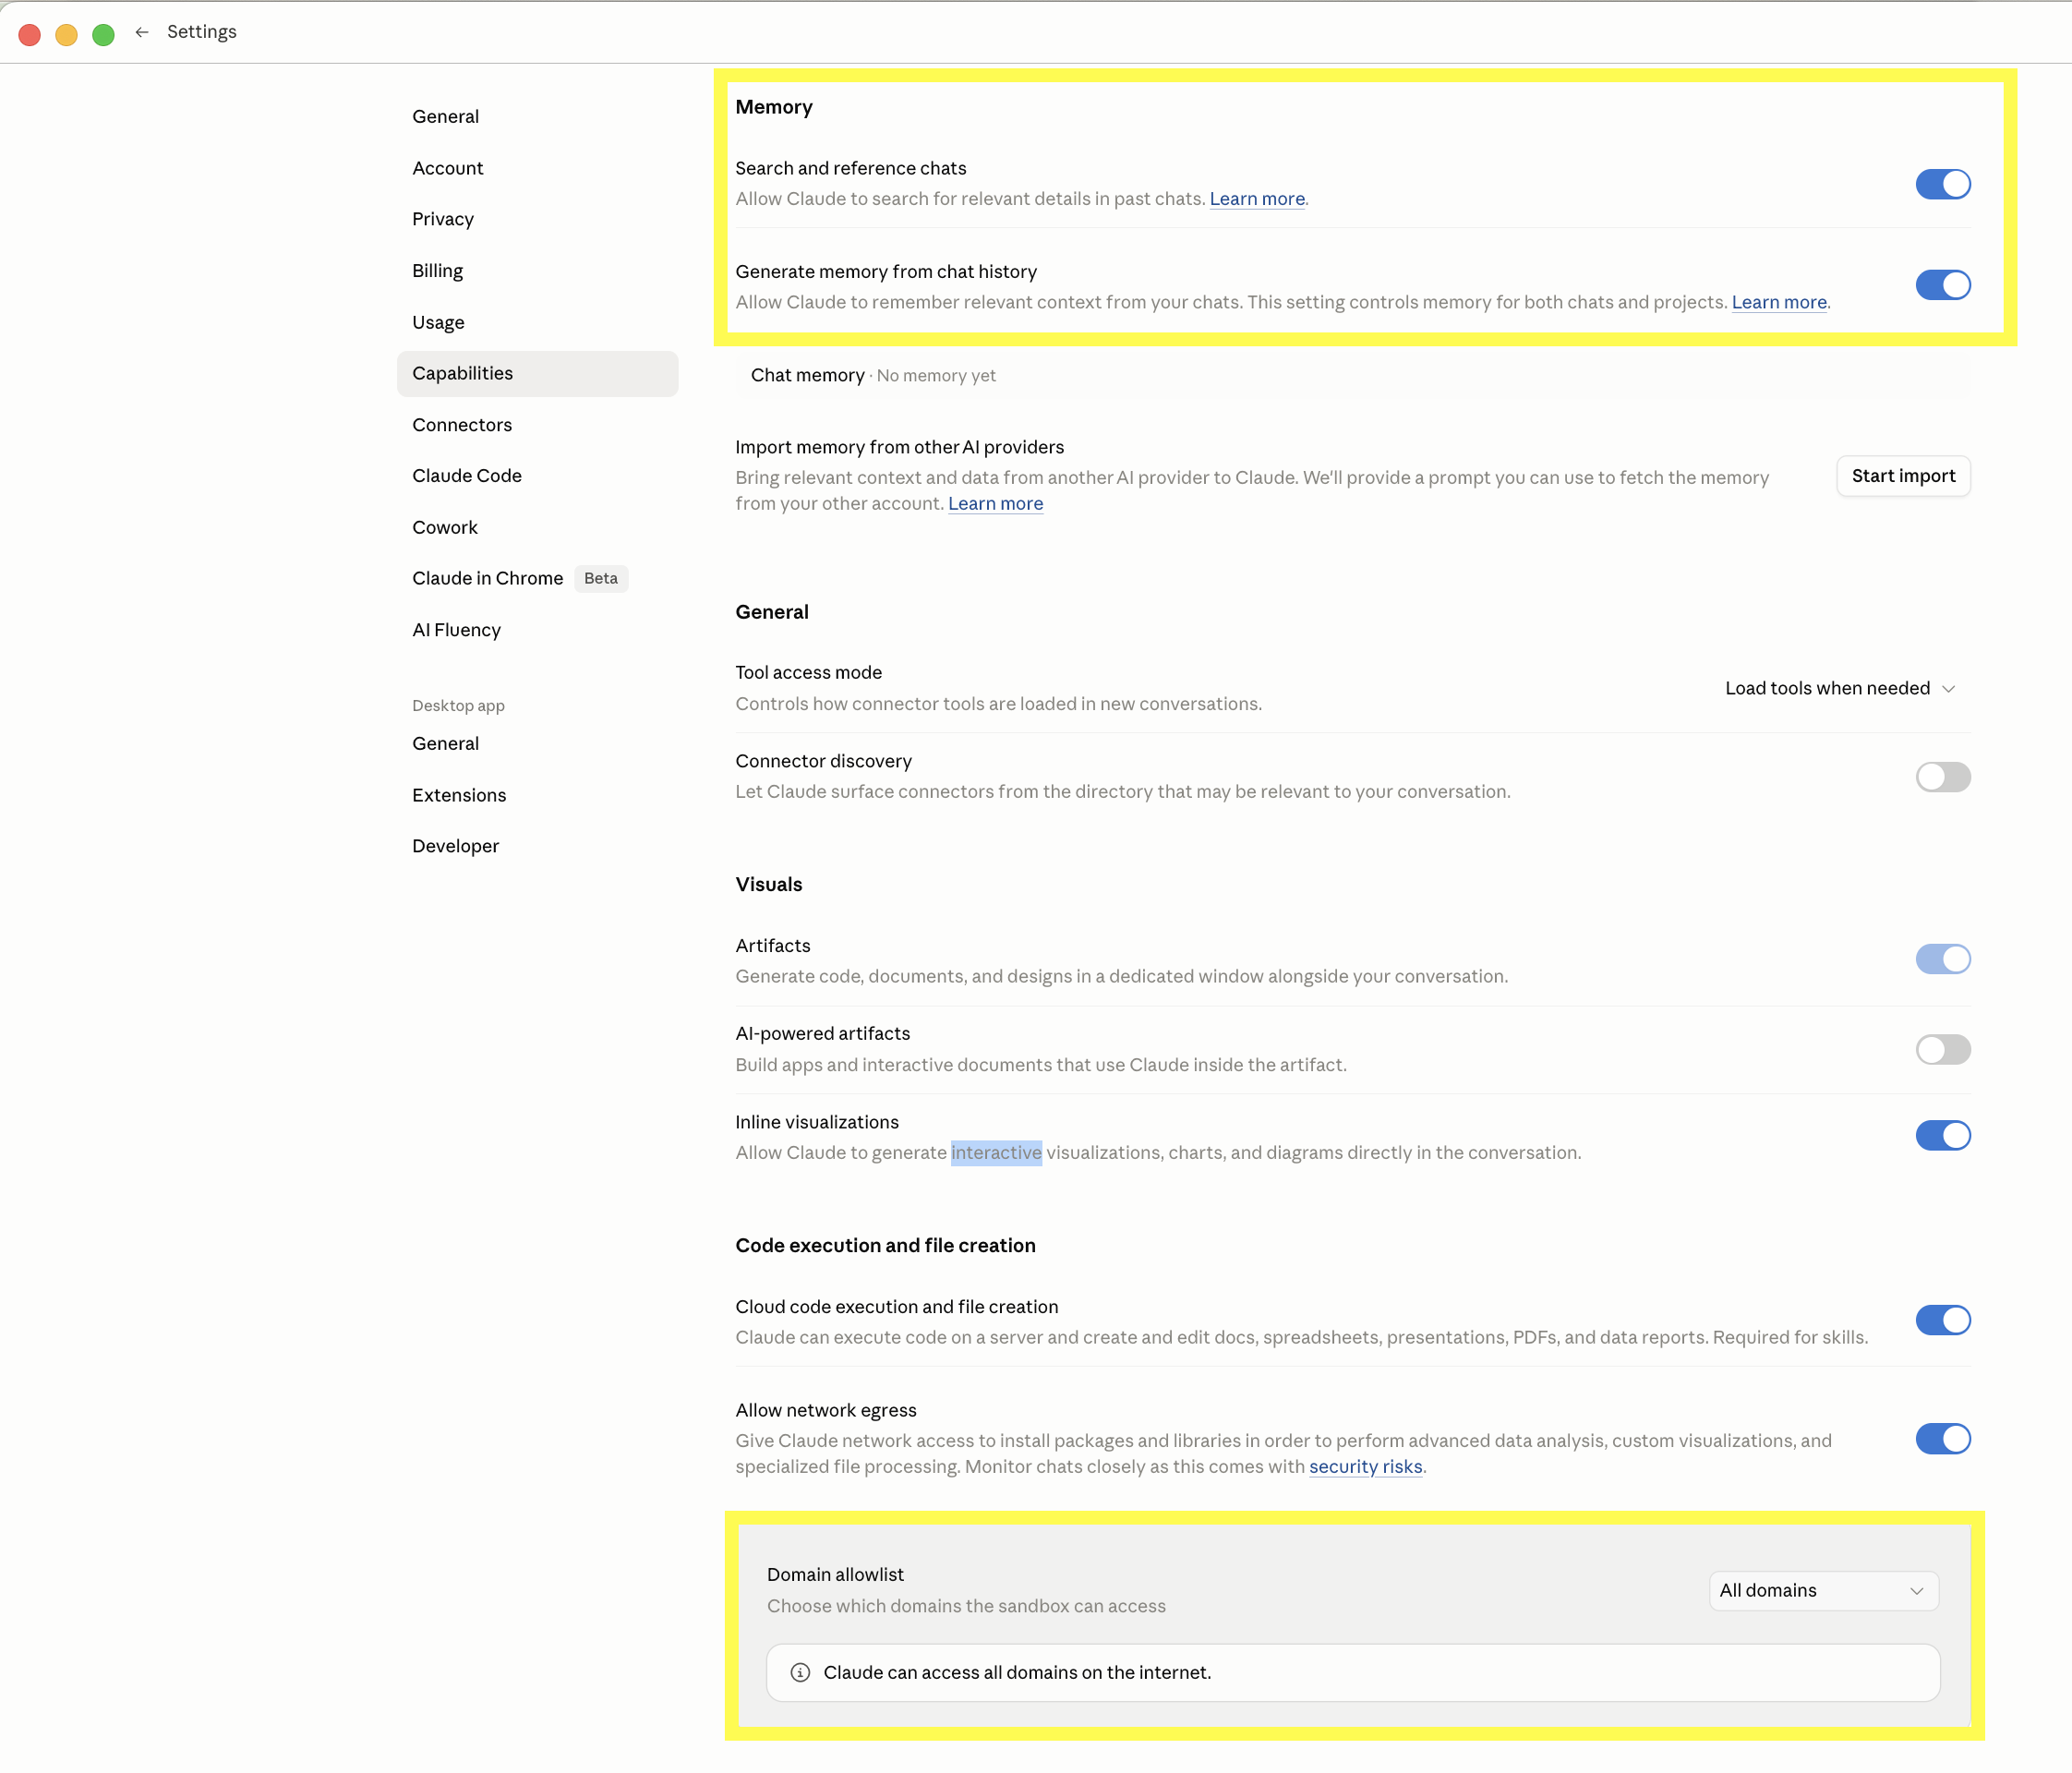
Open Claude, click your name or initials, and go to Settings → Capabilities.
Find the Memory row and switch it on. This is what lets Claude remember your project across chats. Without it, you'd have to re-explain your business at the start of every session.
Then find web access and set it to Allow all websites. This is what lets Claude find stock photos on Pexels and Unsplash during Session 2. Without it, Claude can build the site but can't fill in imagery from the web.
Those are the two settings the skill needs. You can leave everything else as it is.
Create a Netlify account. Connect it to Claude.
Sign up at netlify.com. Settings → Connectors → Netlify → Connect.
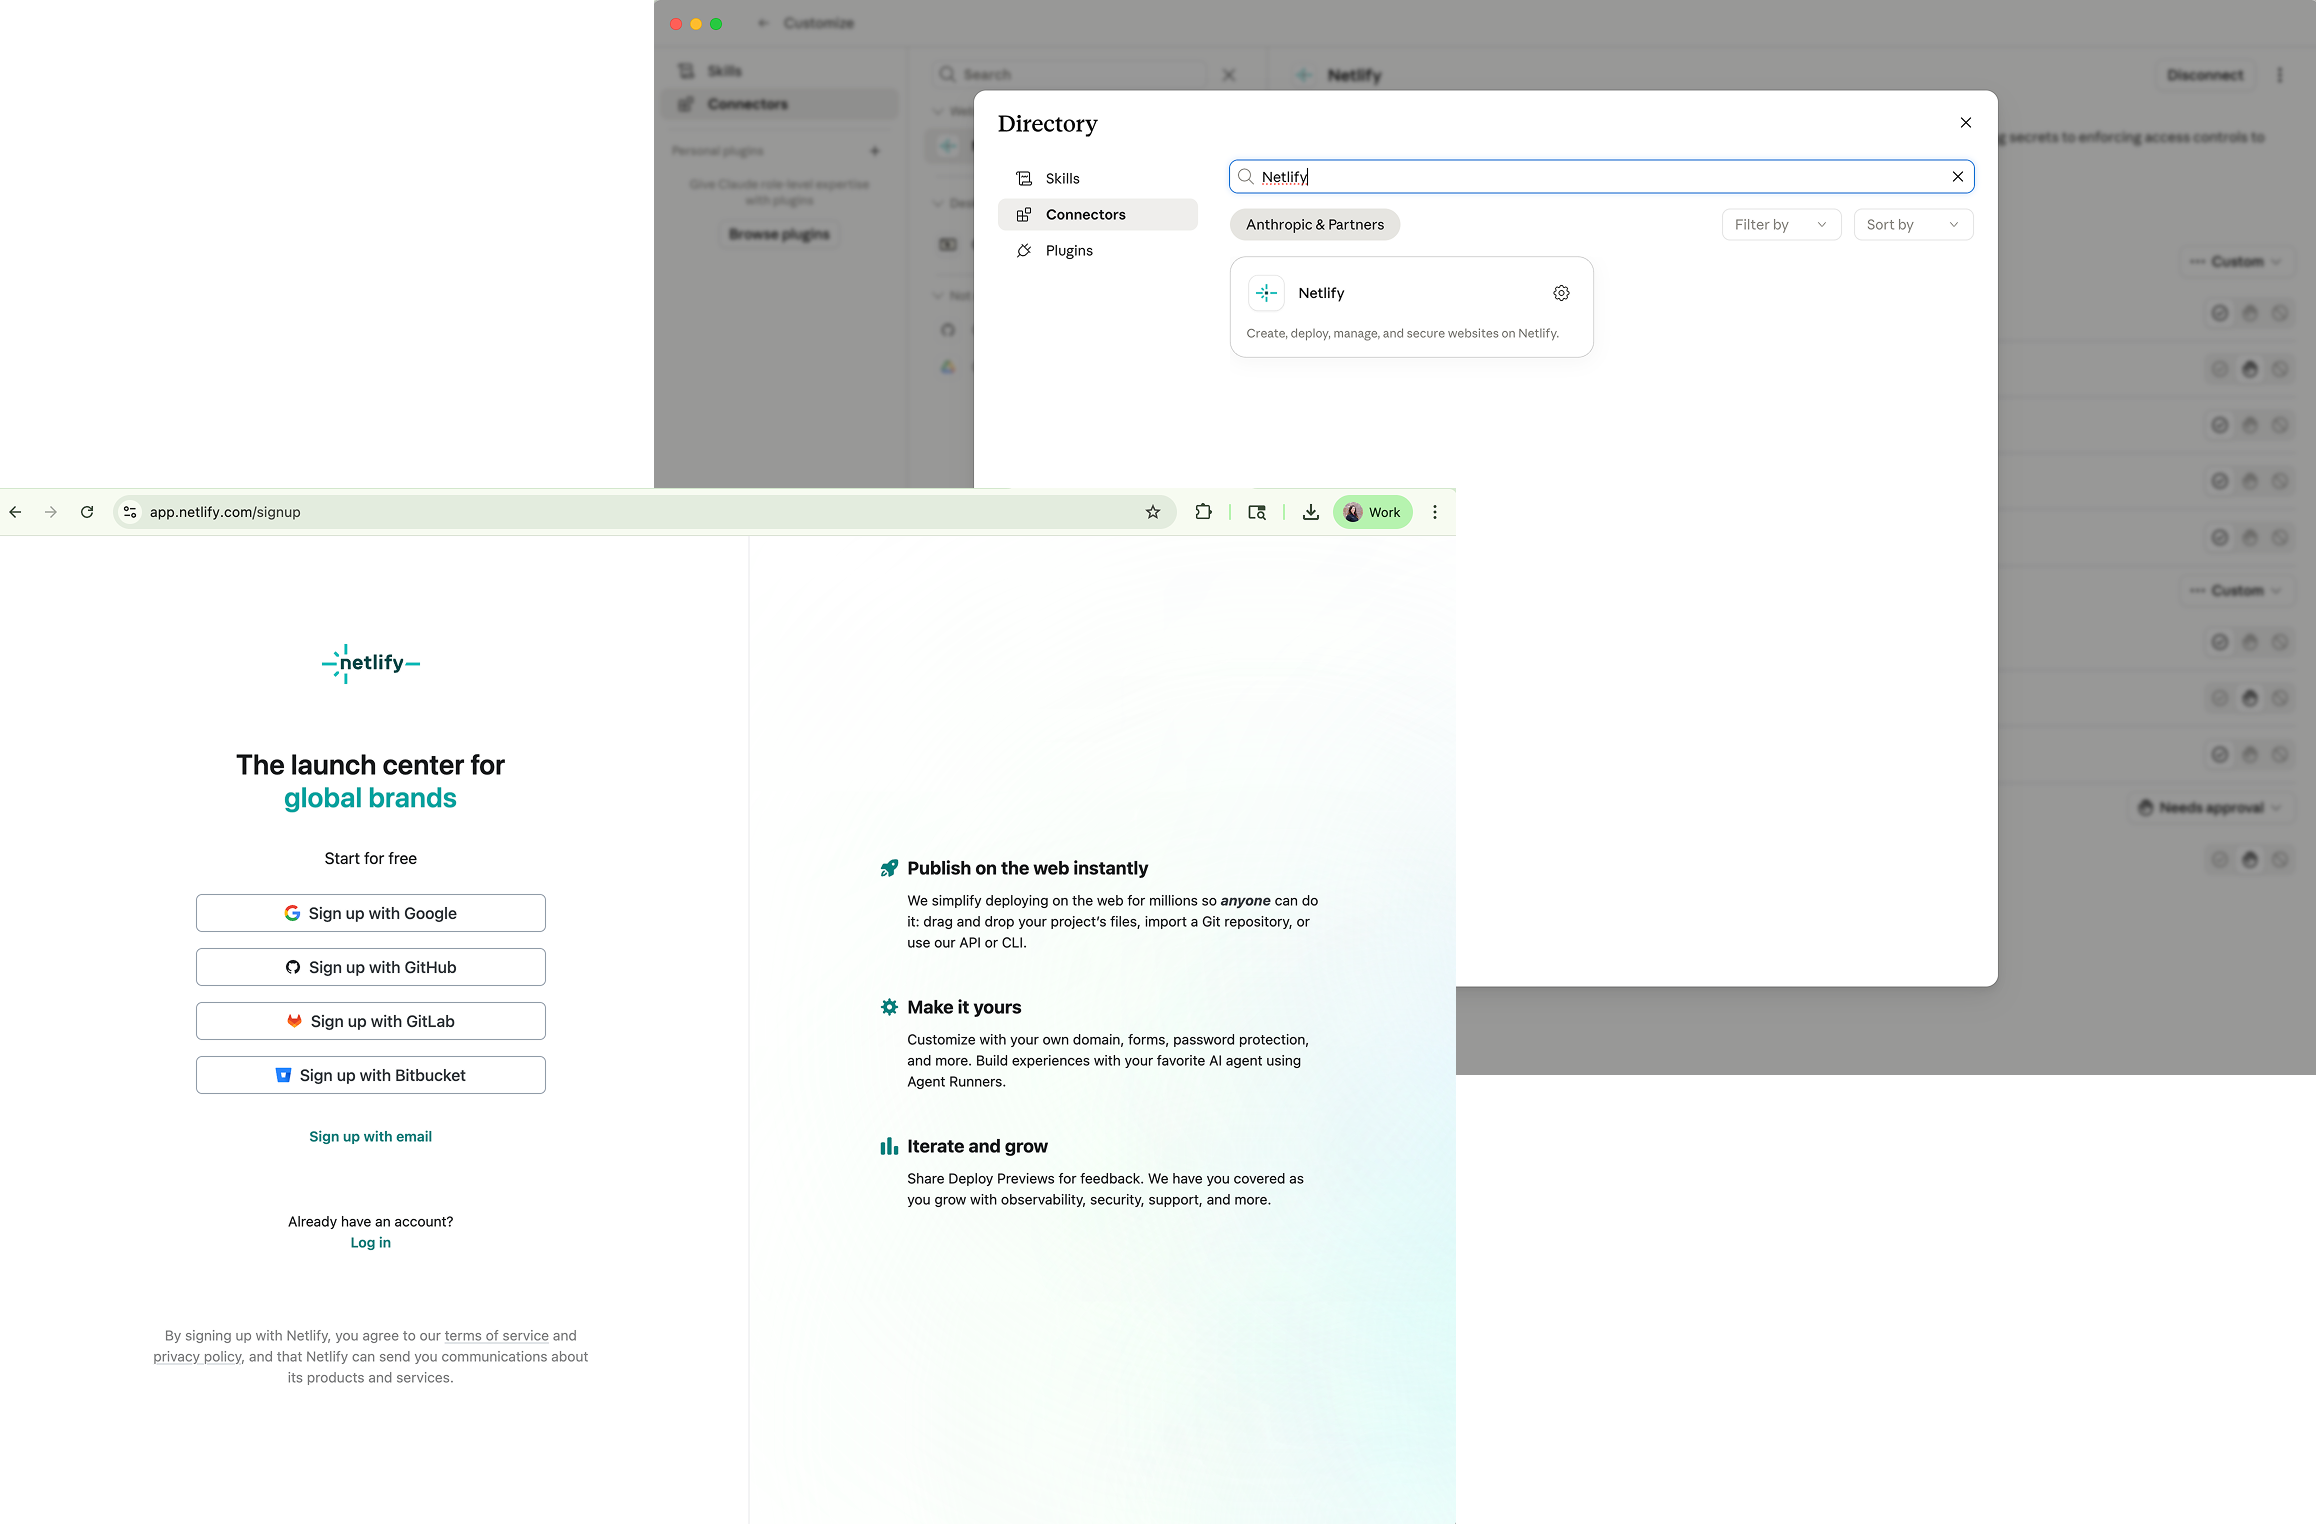
Netlify is what hosts your finished website. Free tier is all you need; no credit card required.
Go to netlify.com and sign up. Then back in Claude, go to Settings → Connectors, find Netlify in the list, and click Connect. Sign in with your Netlify account and approve the connection. When it's done, you'll see a green Connected badge.
One thing you'll come back to later: form email notifications. Your contact form will live on Netlify, and you'll want Netlify to email you when someone submits it. Setup happens during Session 2, right after your first staging deploy — a 2-minute click path inside the Netlify dashboard plus a verification link Netlify emails you. Claude walks you through it. It's not now because your specific Netlify site doesn't exist yet.
Drop your logo and photos into the photo folder.
My Website / My Photos and Logo
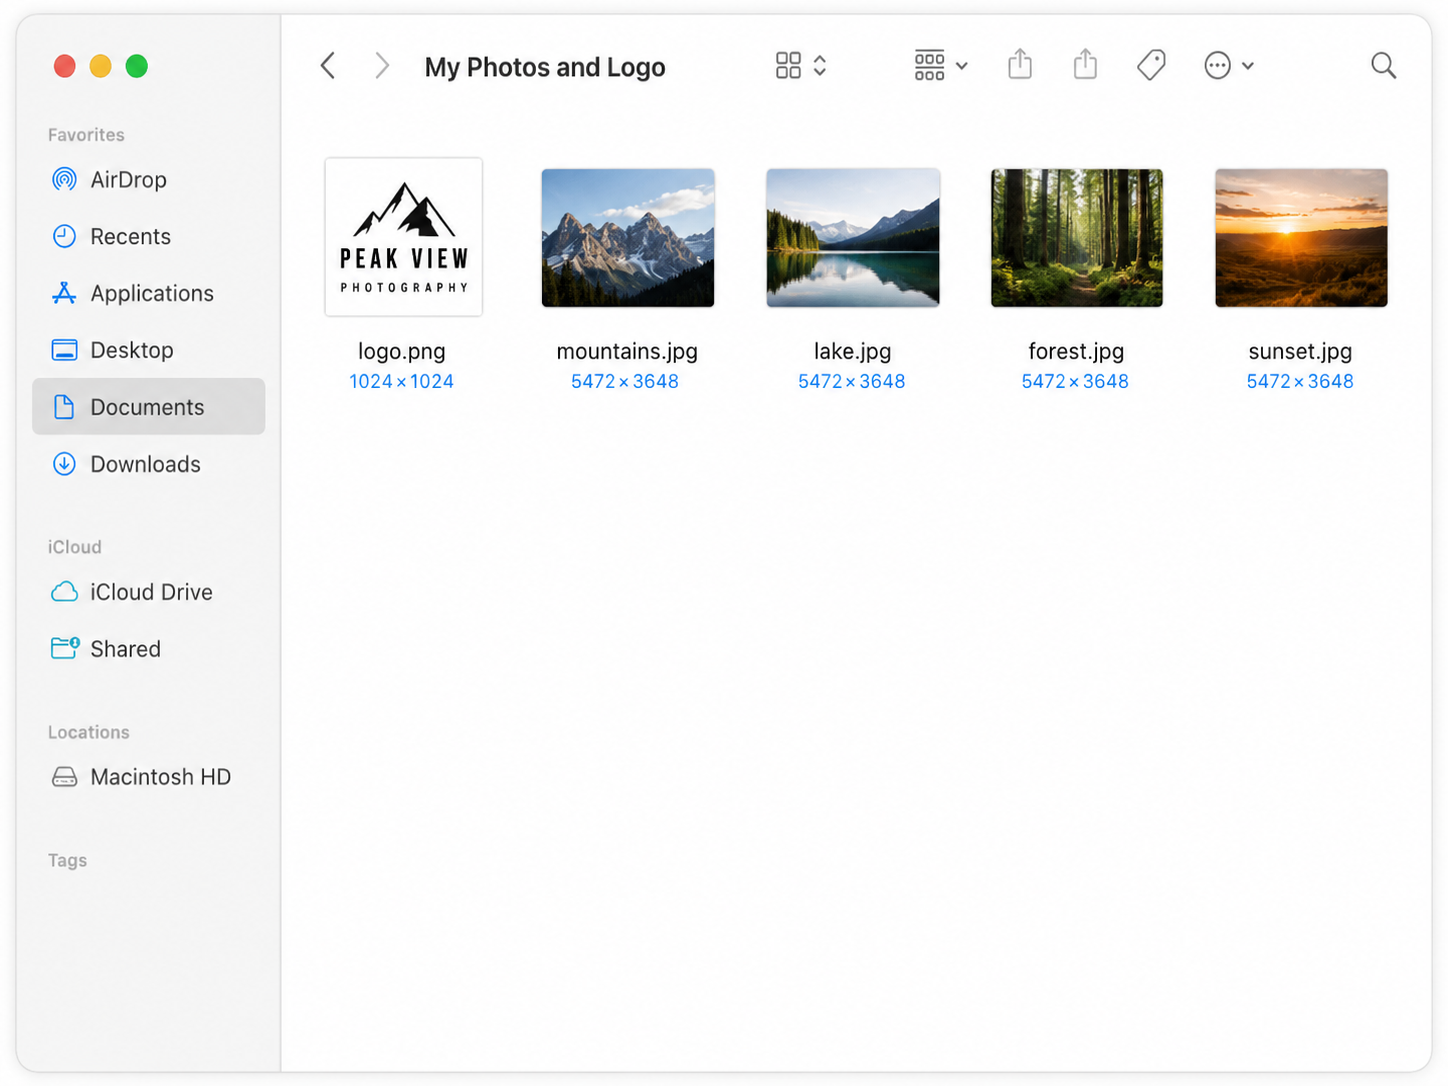
Open the My Website folder on your computer, then open the My Photos and Logo subfolder inside it. Drop your logo and any business photos in there. PNG, JPG, and SVG all work for logos.
If you don't have photos of your own yet, this is the moment to grab a few. Browse pexels.com or unsplash.com, pick imagery that fits your business, download what you like, and drop the files into the same folder.
Even three or four good photos make a meaningful difference in how on-brand your site feels. You can add more later. The folder isn't locked.
Register the skill via Customize → Skills.
Settings → Customize → Skills. Add SKILL.md.
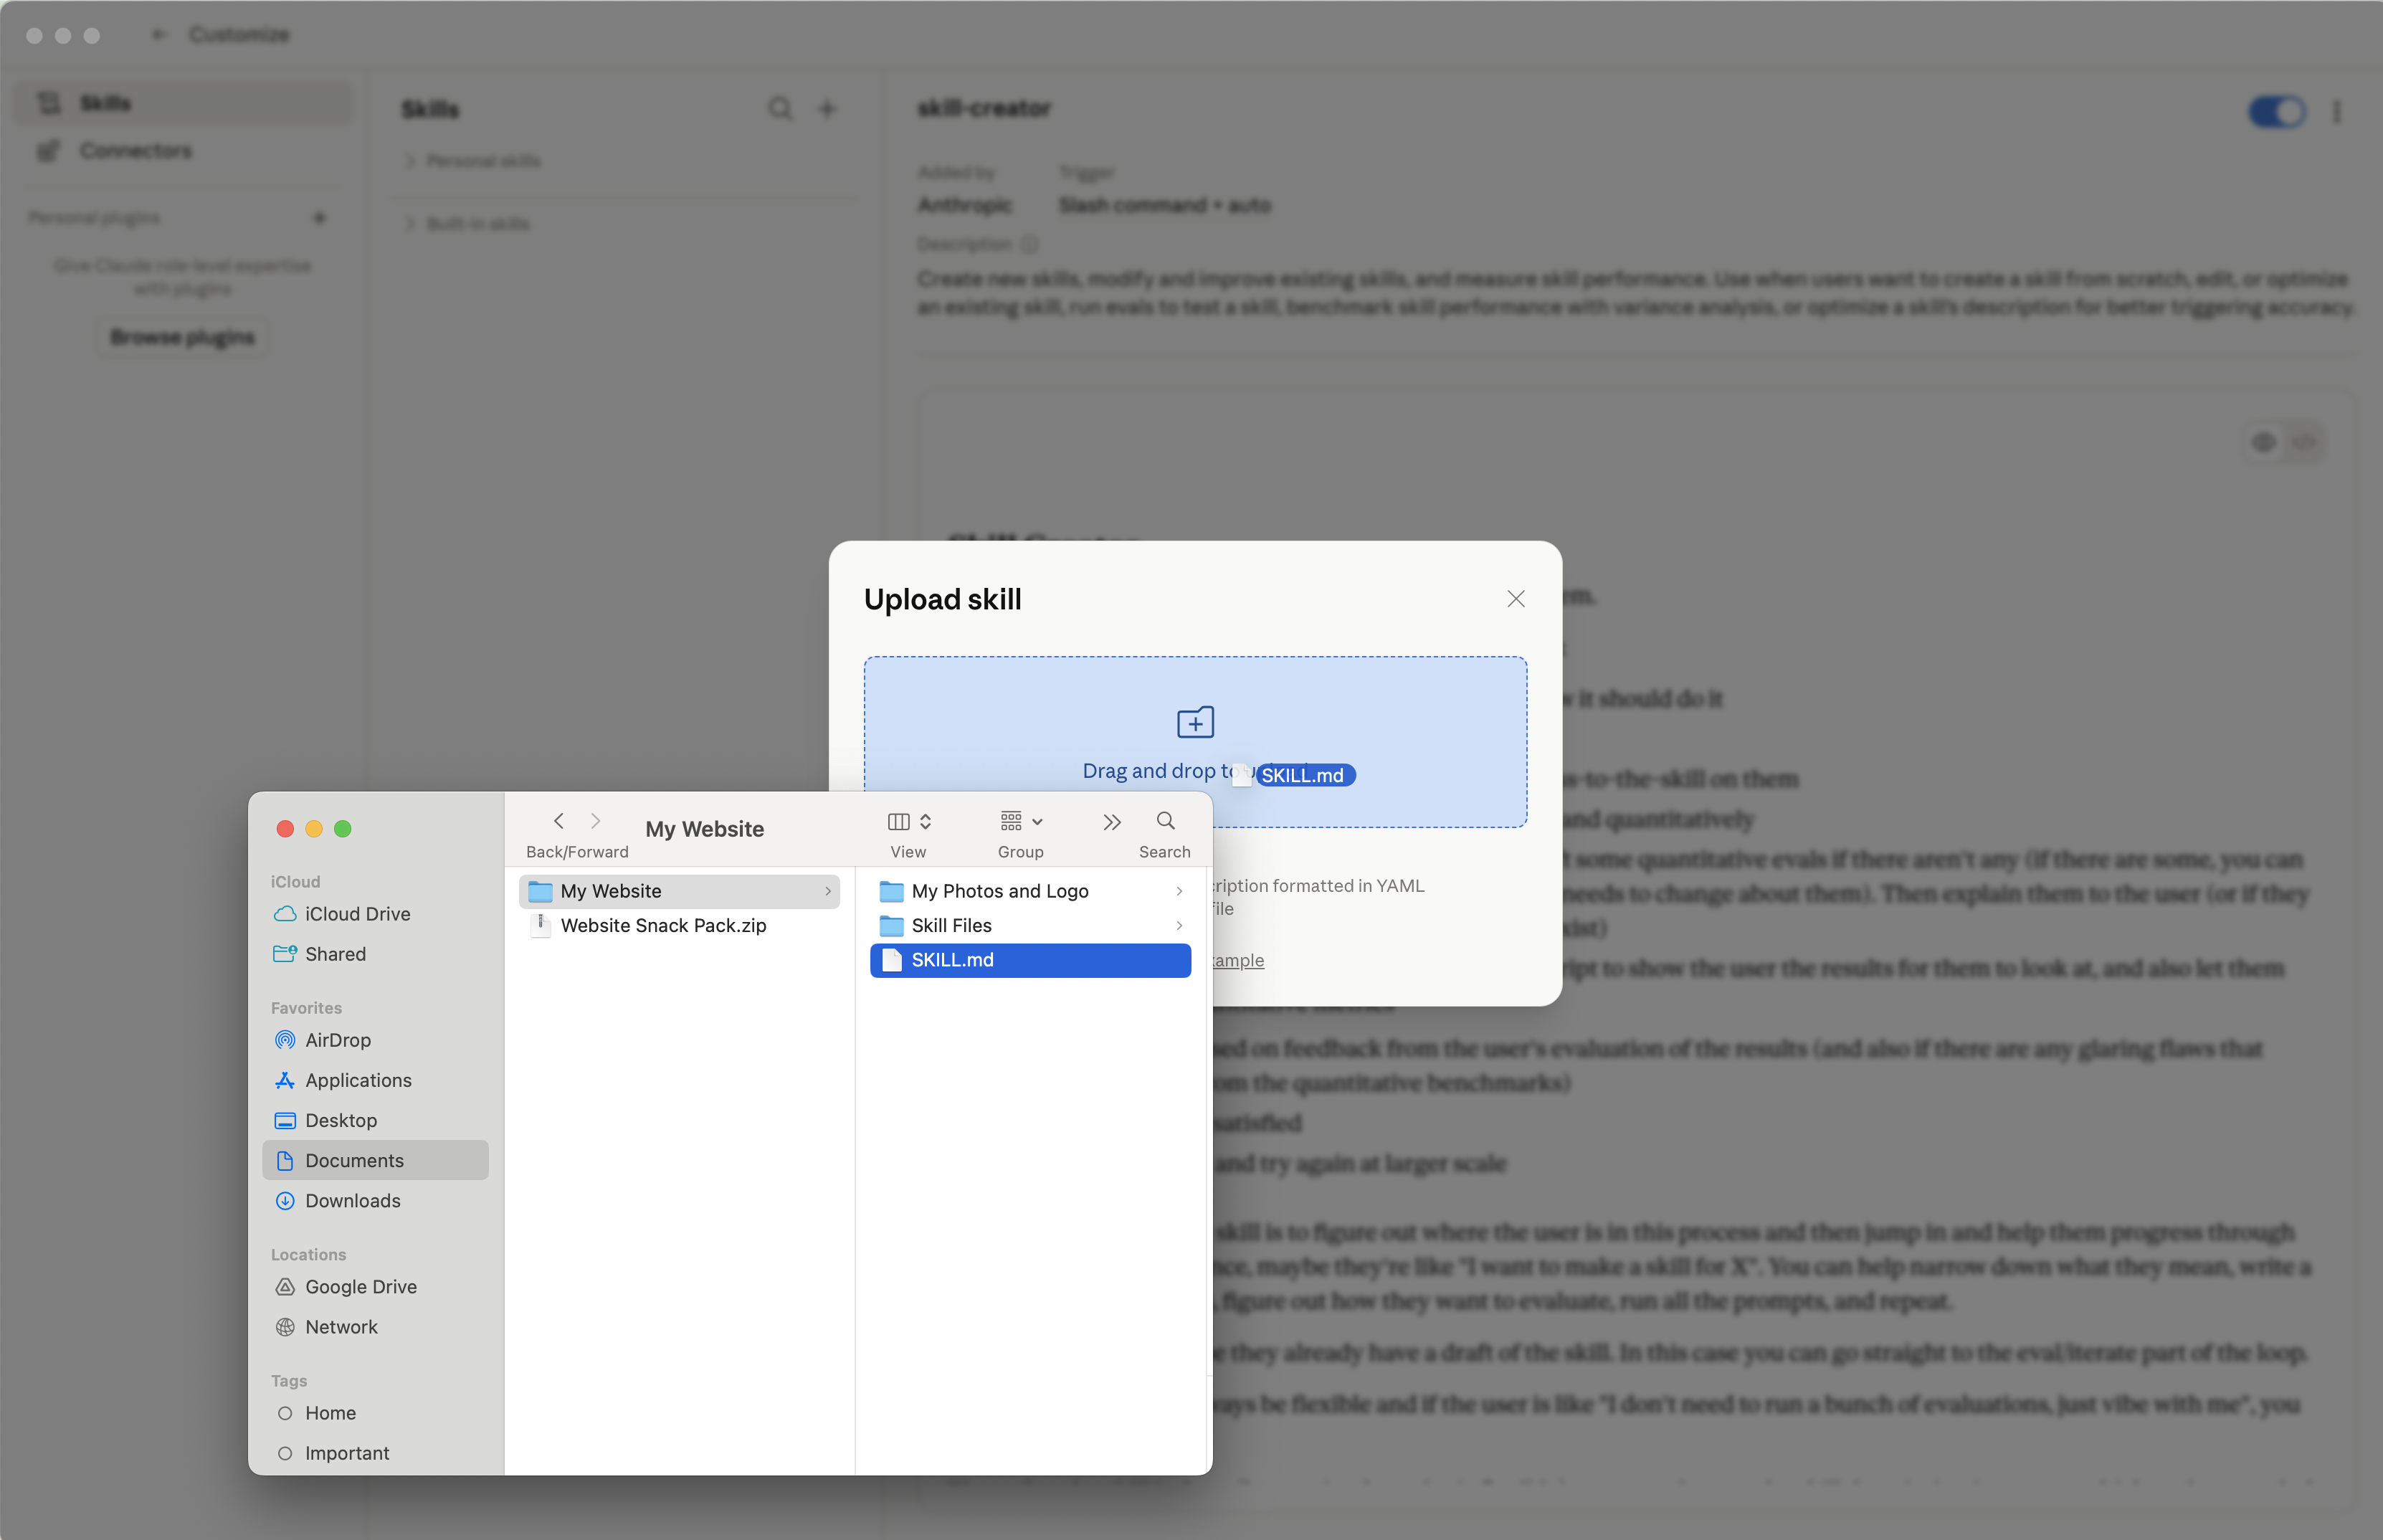
In Claude, go to Settings → Customize → Skills. Click to add a new skill. In the file picker, navigate into your unzipped Snack Pack folder and pick SKILL.md (the file that sits right next to the My Website folder, not inside it).
This is the step that makes the skill triggerable from plain-English chat. Without it, Claude can read files but won't activate the skill when you ask it to build your website.
Create a Cowork project. Pin it.
Name it "My Website." Point it at the My Website folder. Click the pin.
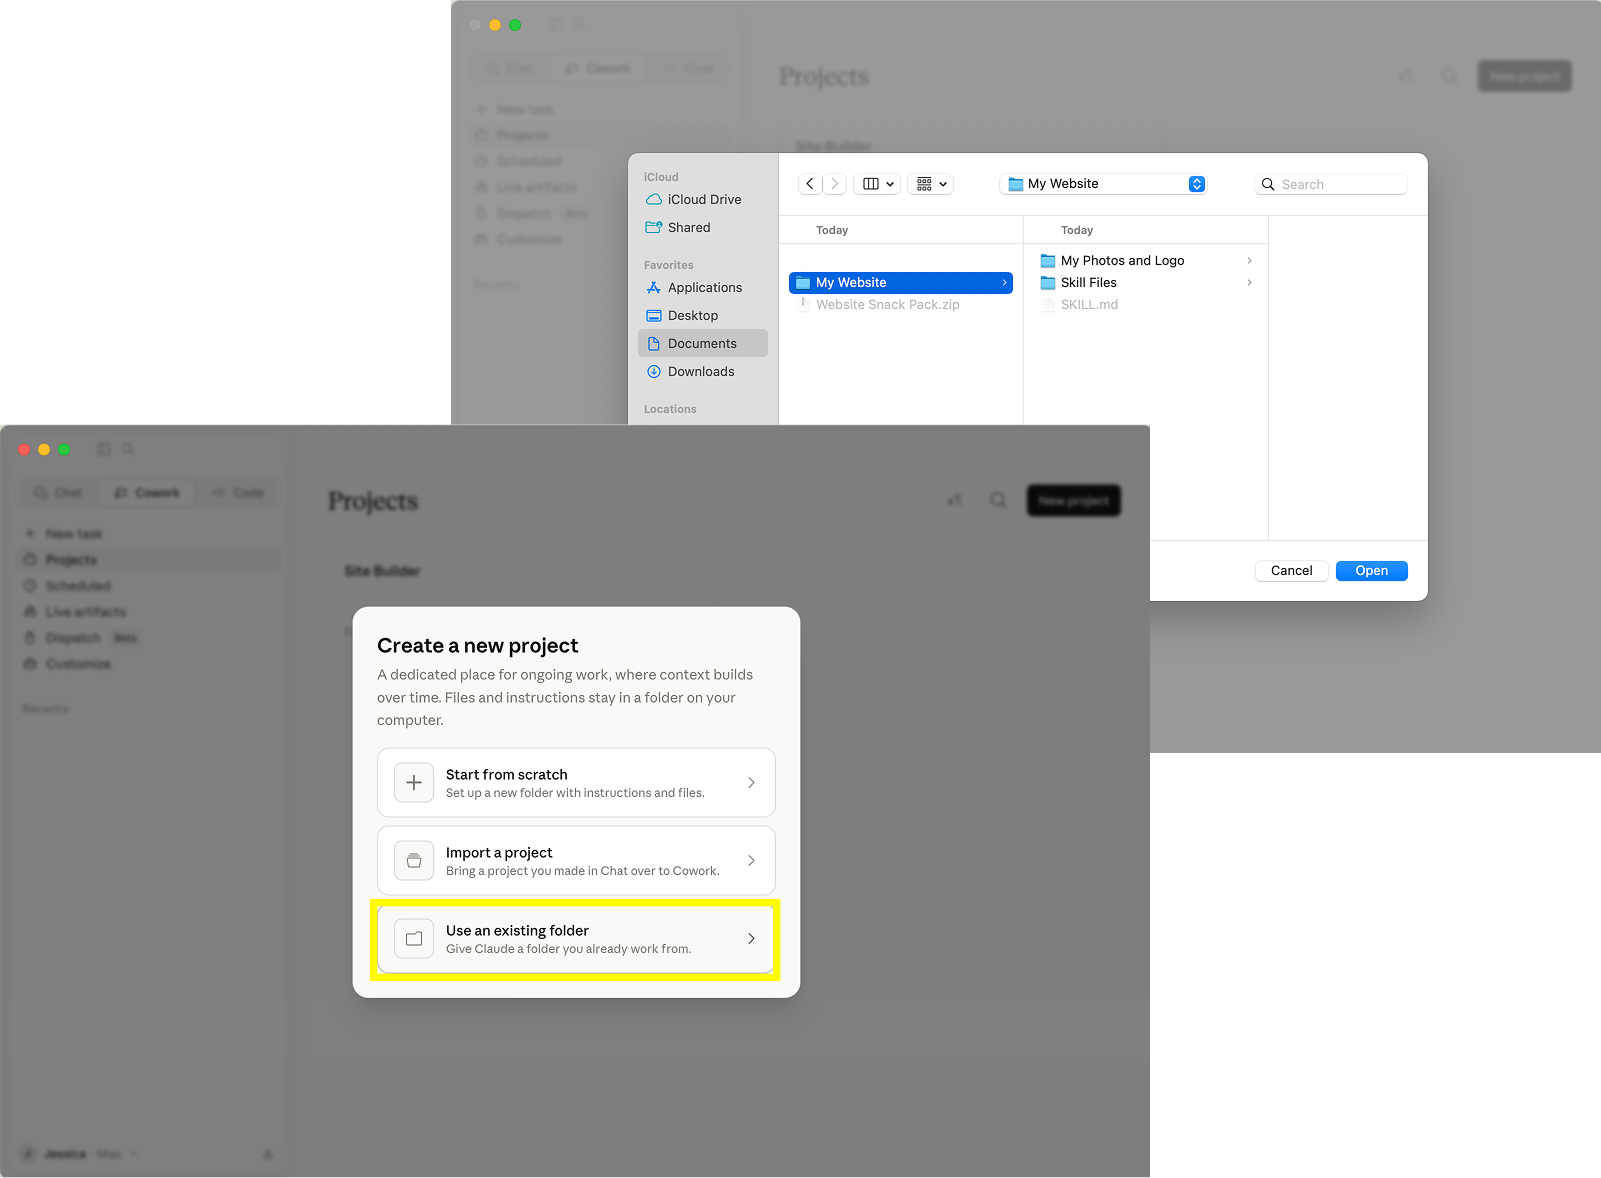
In Claude's left sidebar, create a new Cowork project. Name it My Website. When it asks you to pick a folder, point it at the My Website folder inside your unzipped Snack Pack folder (wherever you saved it in Step 1).
Important: point at the My Website folder, not at the outer Snack Pack folder. The Cowork project is what gives Claude file-level access to your project, and Claude needs to be looking inside My Website specifically.
Pin the project as soon as you create it. Click the pin icon next to the project name. Pinning is what keeps the project visible in your sidebar between visits. Unpinned projects disappear from the sidebar, and you'll have to dig around to find them.
Step 6 (skill registration) and Step 7 (Cowork project setup) are two separate things, and both are required. Skipping either one means the skill won't run.
Open your project. Start your first session.
Type: Build my website. Session 1. Claude guides you through Sessions 2 and 3 from there.
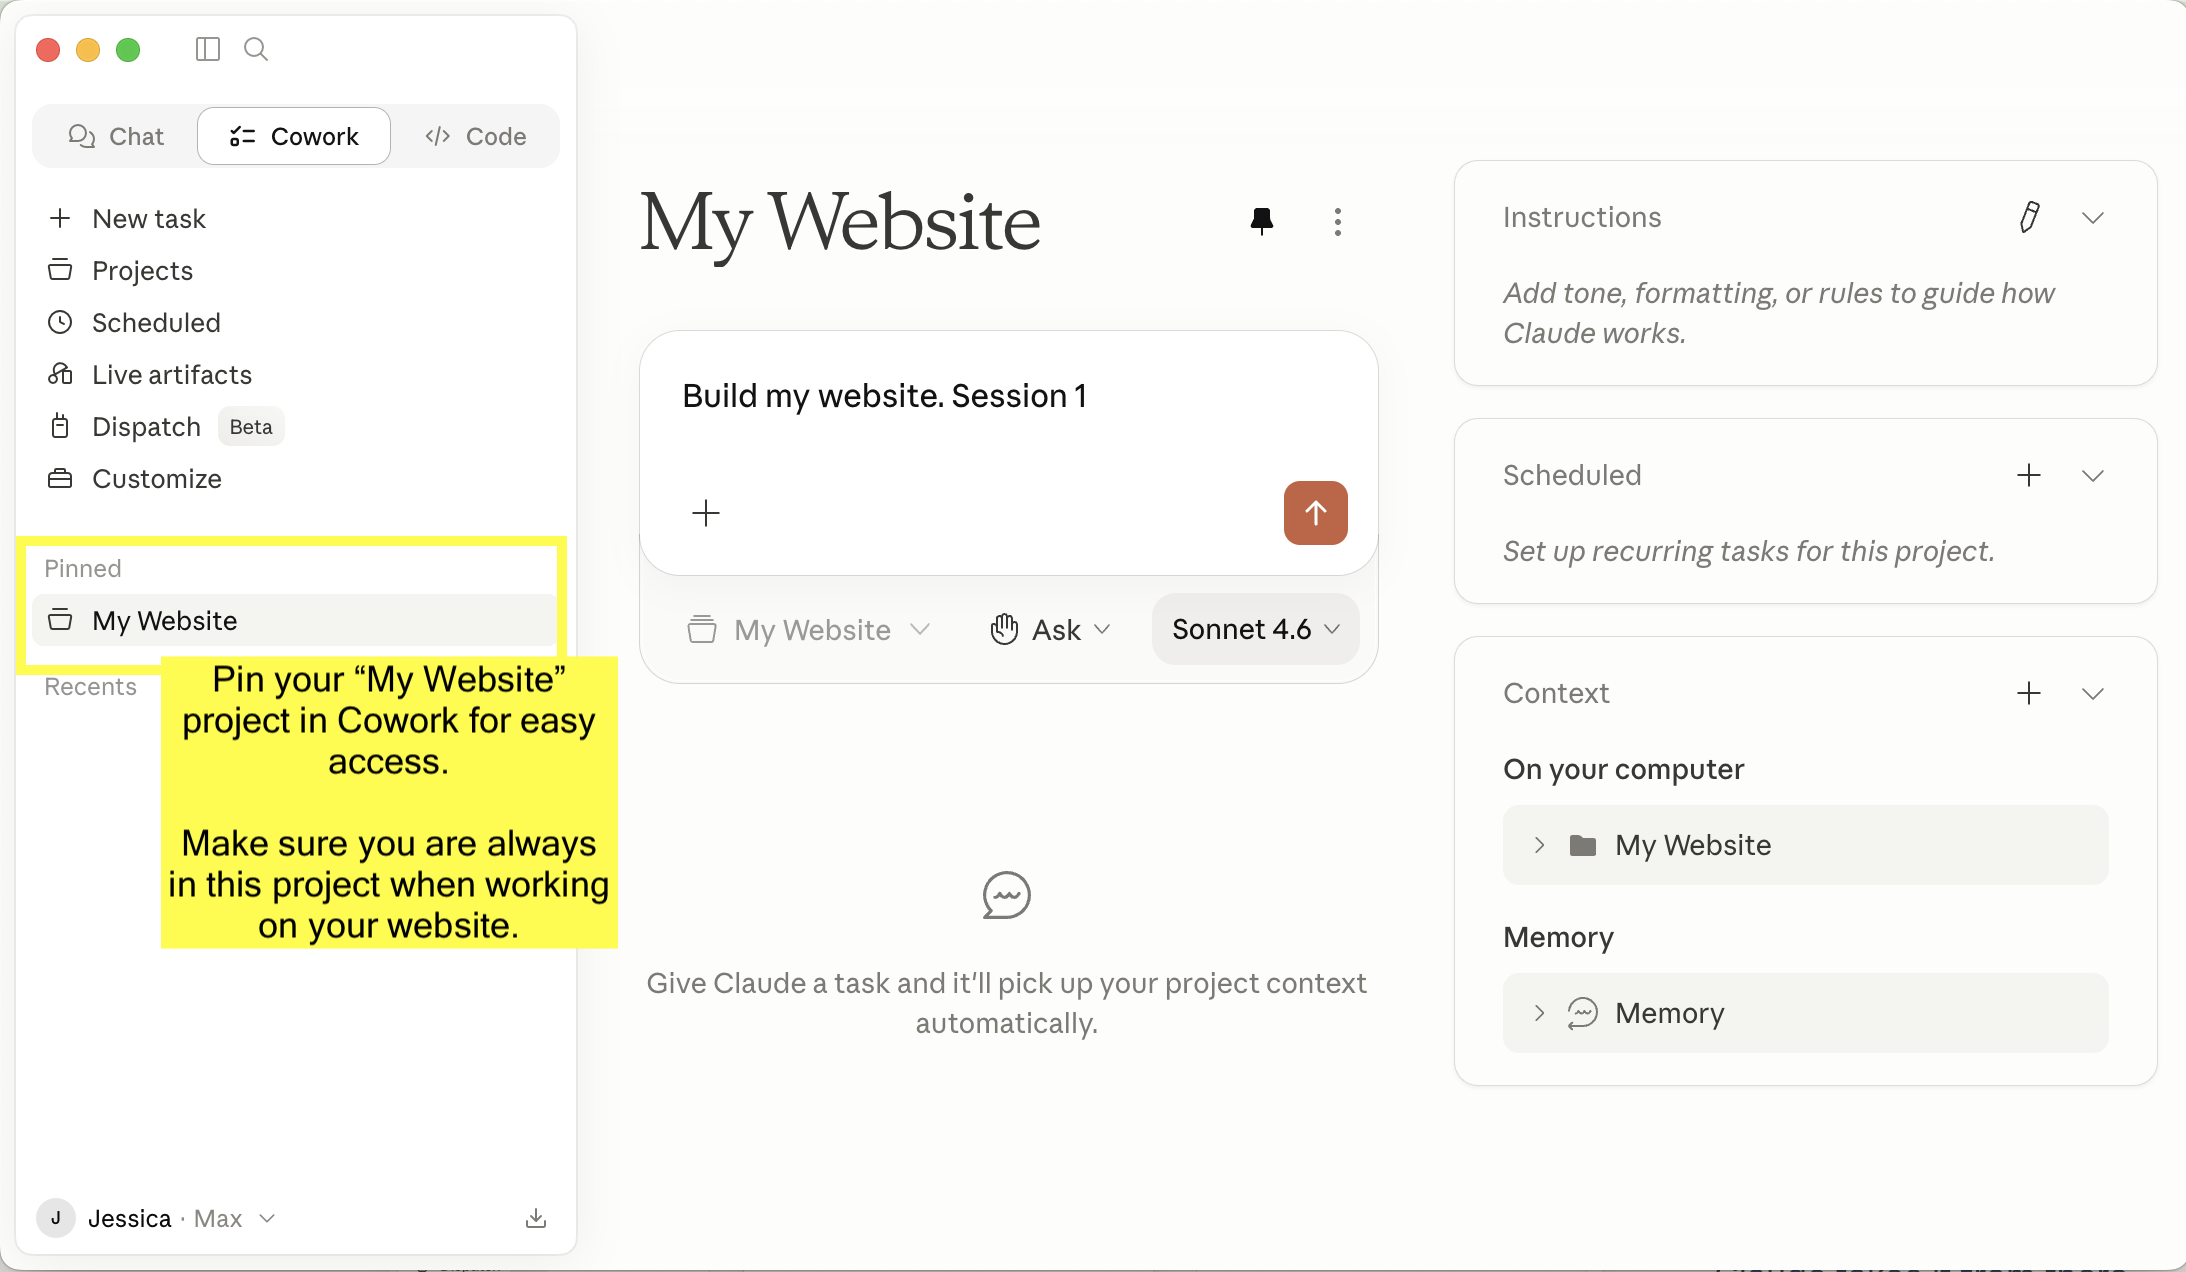
You're set. Open the My Website project in Claude's left sidebar, click to start a new chat, and type:
Build my website. Session 1.
Claude takes it from there.
This is the only activation phrase you need to remember. At the end of Session 1, Claude tells you exactly how to start Session 2 — whenever you're ready, whether that's a few hours later, the next morning, or next week. Same at the end of Session 2 for kicking off Session 3. Just start here and follow Claude's lead.
Five small things that save first-timers a lot of friction.
- 1Always be in your My Website Cowork project. Not regular chat, not claude.ai, not Claude Code.
- 2Match the model to the session. Sonnet for Discovery, Opus for Build, Sonnet for Launch.
- 3Shift + Enter starts a new line in chat. Plain Enter sends.
- 4"Build my website. Session 1/2/3." Same pattern for all three sessions.
- 5Stuck? Just ask Claude. Plain English works. "I'm not sure what to do" is fine.
Always be in your My Website Cowork project. This is the file-aware project you created and pinned in Step 7. If you start a chat anywhere else — a regular Claude Desktop chat, claude.ai in your browser, or Claude Code — the skill can't see your files and won't work. Same rule, every session, every update visit, every time. (If My Website isn't showing in your sidebar, it probably got unpinned. Click the pin icon and it stays put.)
Match the model to the session. At the start of each session, look at the model selector in the chat input area and pick:
- Session 1 (Discovery): Sonnet
- Session 2 (Build): Opus
- Session 3 (Launch): Sonnet
Sonnet handles Discovery's conversational drafting and Launch's procedural work efficiently. Session 2 is where Opus earns its keep — design judgment and creative writing across every page benefit noticeably from the stronger model. Opus uses more of your Claude allowance, which is part of why Sessions 1 and 2 need some space between them on Pro.
Shift + Enter starts a new line. This matters most in Session 1, where Claude often asks a question that deserves a few sentences of answer. Shift + Enter lets you write the whole answer, read it back, and only hit Enter when you're ready to send.
How to start each session:
- Session 1: Build my website. Session 1.
- Session 2: Build my website. Session 2.
- Session 3: Build my website. Session 3.
If you get stuck, ask Claude. "What does this mean?" "Can you explain that again?" There's no wrong way to ask.
Discovery
Section 5Plan 30 to 60 minutes. Be thorough. The depth of your answers shows up in the depth of your website.
Session 1 is the foundation for everything that comes next. The single most important thing you can do here is be thorough. Claude does better work the more context you give it. Read every question completely. Read Claude's draft suggestions carefully. Give detailed, specific answers.
Every extra detail you share about your business, your customers, what you do day-to-day, and what makes you different shows up in the final website. There's no prize for finishing fast. Customers who spend an hour in Discovery end up with significantly stronger sites than customers who rush.
What to expect. Claude introduces itself, explains the three-session structure, and starts asking one guided question at a time. You don't have to write anything from scratch. Claude drafts options; you react.
What gets covered. Your business, ideal customer, key differentiator, primary call to action, brand vibe, sitemap, services, testimonials, business specifics, integrations, contact details. A few dynamic follow-up questions near the end catch anything specific the standard topics might have missed.
At the end, Claude generates the full site brief, shows it to you, asks you to confirm, and saves it to your folder.
Build
Section 6The heaviest session. Start it with a fresh Claude usage allowance.
Session 2 runs on Opus, which produces a meaningfully better website but uses more of your Claude allowance per message. That's part of why Session 1 plus Session 2 is too much to run back-to-back on Pro. Claude's usage limits reset on a rolling window of a few hours, so the easiest pattern is to do Session 1 (on Sonnet) one day, take a break, and come back to Session 2 (on Opus) a few hours later. On Max, you have room to roll from Discovery straight into Build without waiting.
Session 2 is where Claude does the actual building. Drafting copy for every page, committing to a design direction, assembling the HTML, wiring up the contact form, and deploying everything to a private staging URL for your review.
Local preview first. When the first version is built, Claude shows you the site files in your folder so you can open them in your browser and see the real thing.
Asking for changes is plain English. Make the hero heading shorter. Swap the hero photo for something warmer. Move Services before About in the nav. Claude makes the change and shows you the updated files.
The Polish Stage. Once your revisions are in, Claude proactively flags anything that could still be stronger. You decide what's worth polishing and what's good to ship.
Staging deploy. Once you approve the local preview, Claude pushes the site to a private staging URL on Netlify (something like your-business-preview.netlify.app). Staging is a real, live URL on the internet — anyone you share the link with can see it — but it isn't connected to your real domain yet and it doesn't show up in search results. Think of it as your private testing ground.
What staging is great for: Share the link with a colleague, advisor, or friend and ask for honest feedback. Wire up your contact form for real — once staging is up, Claude walks you through turning on email notifications for your form in the Netlify dashboard (2 minutes of clicks plus a verification link Netlify emails you, often lands in spam the first time), then a test submission should land in your inbox. Catch anything local preview missed — images load from real URLs, mobile rendering matches production, links resolve the way they will on the live site. Open the site on your computer and then on your phone. Most of your visitors will see your site on a phone first.
Stay in staging as long as you need. Keep iterating. Come back the next morning with fresh eyes. There's no clock running. Session 3 is the moment you flip the site live to the public.
Launch
Section 7Go live. Connect your domain. Set up analytics. Plan for 30 to 60 minutes.
- 1Go live. Promote staging to your production Netlify URL.
- 2Custom domain. Optional. Claude walks you through pointing your domain at Netlify.
- 3Google Analytics. Tracking installed on every page.
- 4Search Console. Verify ownership, submit your sitemap.
- 5Form notifications. Final check inside Netlify.
- 6Updates skill saved. Claude writes
updates-SKILL.mdto your folder.
Session 3 takes your approved staging site live and gets the rest of the launch logistics handled. It moves fast, especially compared to Sessions 1 and 2.
Custom domain. If you own a domain, Claude walks you through pointing it at Netlify step by step. If you don't have one yet, Claude can wait. You can always connect a domain later through an update session.
Privacy Policy and Terms of Service. Most small business websites should have both. They're your legal documents, so Claude doesn't write them for you, but Claude will point you toward services like Termly or iubenda. Once you have the text, paste it into an update session and Claude will add the pages and link them in the footer.
Post-launch checklist. Share the URL on social. Add it to your email signature. Ask three customers to leave a review.
The updates skill. At the close of Session 3, Claude saves updates-SKILL.md to your My Website folder. The first time you want to make a change, register it via Settings → Customize → Skills, just like you did with the original SKILL.md. From then on, any chat you start in the My Website project will use it.
Open My Website. Tell Claude what to change. Done.
- Add a new service called "monthly retainer."
- Update the hours. We're now open Saturdays 10 to 2.
- Replace the hero photo with this new one.
- Change the primary color from teal to navy.
Any time after launch, open your My Website project, start a new chat, and tell Claude what you want to change. The updates skill is built for fast, surgical edits. Claude reads your site brief and your existing site files, asks what's changing, makes only those changes, redeploys to staging for your approval, and pushes live.
Claude only touches what you ask it to touch. Everything else stays exactly as it is.
If you ever want to make a bigger change (a full rebuild, a brand refresh, a totally new set of pages), just say so. Claude will scope the work with you before starting and let you know if the change is larger than a typical update.
Drop a file. Say "Publish this post." Done.
If you opted into a blog, news, insights, or updates section in Session 1, here's how publishing works.
Write your post wherever you like. Google Docs, Apple Notes, Notion, plain text. Whatever's easy.
Save it as a date-prefixed text file in your My Website folder. Name it post-YYYY-MM-DD-title.txt. The date prefix is what Claude uses to sort posts in reverse chronological order.
Tell Claude: Publish this post. Claude generates the post HTML, rebuilds your index page (with pagination once you have more than ten posts), updates the post manifest in your site brief, and deploys.
One drop and one sentence. That's the whole flow.
When something feels off, here's where to look first.
And if you're stuck on something not listed here, just ask Claude. That works for almost everything.
| Symptom | Try this |
|---|---|
| Claude doesn't seem to know what site I'm working on. | Check the left sidebar and confirm "My Website" is selected. Then check Settings → Capabilities → Memory and make sure it's on. |
| My Website doesn't show up in my sidebar anymore. | It got unpinned. Open the project list, find My Website, and click the pin icon next to it. Pinned projects stay visible. |
| Claude isn't running the skill. | The skill probably isn't registered. Go to Settings → Customize → Skills and add SKILL.md from your unzipped Snack Pack. |
| Skill is registered, but Claude still won't trigger it. | Your Cowork project might be pointing at the wrong folder. It should point at the My Website folder inside your Snack Pack, not the outer Snack Pack folder. |
| Netlify deployment fails. | Go to Settings → Connectors and reconnect Netlify. Then ask Claude to try the deploy again. If it still fails, Claude can package a manual deploy zip for you. |
| Stock photos aren't loading during the build. | Web access is probably blocked. Settings → Capabilities and set web access to "Allow all websites." |
| Form captures submissions but no emails arrive. | The Netlify verification email didn't get clicked. Check spam, click the verification link, then submit a test through your live form. |
| Photos won't save when I drop them into the chat. | Photos need to go in the folder, not in the chat. Drag them into My Website / My Photos and Logo using Finder or Explorer. |
| I forgot which session I'm on. | Open site_brief.md in your folder. The Session Status block at the bottom tracks where you are. |
| My site brief has something wrong in it. | Ask Claude to edit it. Don't hand-edit. "Change the primary color to #2A4D3A and the tagline to ..." Claude will edit it and confirm. |
| I'm stuck on something that isn't on this list. | Just ask Claude in plain English. "I'm not sure what to do" works. Claude reads where you are and walks you through it. |
What's in the folder, and what Claude generates as you go.
What Claude adds as you go:
site_brief.md | End of Session 1. Edit by asking Claude. |
build_progress.md | During Session 2. Don't edit. |
index.html, etc. | During Session 2. Edit by asking Claude. |
styles.css | During Session 2. Edit by asking Claude. |
sitemap.xml, robots.txt, favicon.png | During Session 2. Don't edit. |
updates-SKILL.md | End of Session 3. Register via Customize → Skills the first time you want to make an update. |
If you delete one of the "don't edit" files by accident, copy it back from the original Snack Pack zip.
Built for marketing sites with lead capture.
Not built for e-commerce.
Built for this
- Service businesses
- Local businesses
- Creatives & portfolios
- Nonprofits
- Personal brands
- Lead capture / contact forms
Not built for this
- Shopping cart e-commerce
- Inventory management
- Product database stores
The Robot Snacks Website Generator is built for service businesses, local businesses, creatives, nonprofits, personal brands, and thought leaders. It produces marketing pages with lead capture (contact forms, booking links, payment links to Stripe or PayPal). That covers the vast majority of small-business website needs.
It is not built for real e-commerce. If your business model is "people add things to a cart and check out," you need a real e-commerce platform, not this skill. Email us for a refund before you start.
Hosting. Netlify free tier. 100 form submissions per month included.
Usage. Pro covers the whole build. The thing to plan around is that Session 1 plus Session 2 is too much to do back-to-back in one sitting on Pro. Give your Claude usage a few hours to reset between them. Max lets you go straight from Discovery into Build without waiting.
License. Single-user. Please don't share the zip. Every install is tied to your purchase.
Open My Website. Type the line.
Claude takes it from there.
And if you get stuck at any point, just ask Claude in plain English. That's the whole idea.
See you on the other side.